Heavy Battle Rope Kit: Sleeve + Anchor for Safer Slams
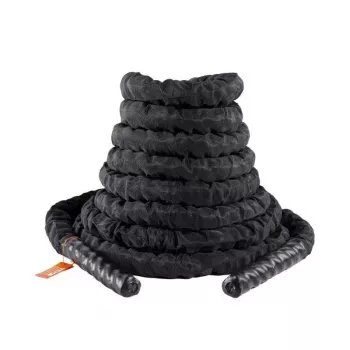
Heavy Battle Rope Training: Protective Sleeve + Anchor for Cleaner Waves, Safer Slams
A heavy battle rope set can turn a small space into a high-output conditioning station. With a protective sleeve to reduce wear at contact points and an anchor for stable setup, it supports powerful waves, slams, and pulls while helping protect both the rope and the mounting surface. For home gyms, garages, and compact training areas, the right setup makes the difference between “good sweat” and a rope that drifts, frays, or feels inconsistent rep to rep.
What comes with the set
A battle rope kit is more than just rope. The add-ons are what make training feel stable, repeatable, and easier to maintain over time.
- Heavy battle rope designed for repeated high-tension intervals
- Protective sleeve positioned for high-friction contact areas (useful where the rope meets the ground or anchor)
- Anchor hardware or anchor component intended to secure the rope to a fixed point
- Best used on a stable, non-moving base (rack post, wall mount point, or dedicated anchor point)
Why the protective sleeve and anchor matter
Battle ropes look simple, but the forces add up fast—especially during slams and hard wave intervals. A secure anchor and a properly placed sleeve help keep training smooth and predictable.
- More consistent training: A fixed anchor keeps the rope from drifting, so waves and slams stay symmetrical.
- Less abrasion: The sleeve helps reduce fraying where the rope repeatedly rubs against hard surfaces.
- Better floor and surface protection: The sleeve can reduce direct rope-on-concrete contact at the highest-wear zone.
- Improved safety: A secure anchor reduces unexpected rope movement that can throw off balance during fast intervals.
For exercise ideas and technique variety, the American Council on Exercise provides training guidance and battle rope exercise examples at ACE Fitness. For broader strength and conditioning best practices, see NSCA.
How to set it up for stability
A stable setup protects your equipment and helps you generate cleaner waves without constantly adjusting your stance or lane.
- Choose a rigid anchor point: Pick a point that does not flex or wobble under load (solid post, stud-mounted wall anchor, or heavy sled-style anchor).
- Place the sleeve at the main wear zone: Typically where the rope runs across the ground or meets the anchor edge. If your lane changes, reposition it.
- Keep usable length on both sides: Leave enough rope so you can create full waves without the ends snapping tight at the top of each rep.
- Test before going all-out: Start with low-power waves. Confirm the anchor doesn’t shift and the rope tracks smoothly.
- Clear the training lane: Remove anything you could step on or trip over—especially during fast intervals.
If you’re building overall weekly activity, the CDC Physical Activity Guidelines can help you balance conditioning with recovery and strength work.
Workouts that fit most fitness levels
Battle ropes are easy to scale: shorten work intervals, reduce intensity, or step closer to the anchor to make the rope feel more responsive. As conditioning improves, extend the interval length and sharpen the wave height.
- Alternating waves: 20–30 seconds work, 30–60 seconds rest; build rhythm before adding intensity.
- Double waves: Drive both arms together; focus on a tall torso and braced core.
- Power slams: Raise the rope ends and slam with hips and core; reset each rep for consistent form.
- Outside circles: Shoulder-friendly option when performed with controlled speed and stable posture.
- Rope pulls (seated or standing): Anchor the rope and pull hand-over-hand for grip, lats, and conditioning.
- Simple conditioning circuit: 6 rounds of 20 seconds waves + 10 seconds rest; then 3–5 minutes easy walk.
Technique cues for better results
Small form adjustments can make a heavy rope feel smoother while helping you keep intensity up across every round.
Care, storage, and long-term durability
Specifications at a glance
| Feature | Notes |
|---|---|
| Protective sleeve | Helps reduce abrasion at the primary contact point; placement can be adjusted based on setup |
| Anchor | Designed to secure the rope to a fixed point for stable waves, slams, and pulls |
| Material | Heavy-duty rope construction intended for conditioning work (exact material may vary by model) |
| Length options | Select based on available training lane and desired resistance; longer ropes typically feel more demanding |
| Diameter options | Thicker ropes generally increase grip and upper-body demand; thinner ropes often move faster |
| Best surfaces | Works well with smooth anchor edges and a clear floor lane; sleeve helps where friction is highest |
Shop in-stock gear
- Heavy Battle Rope with Protective Sleeve & Anchor (stable waves, slams, and pulls in a compact training lane)
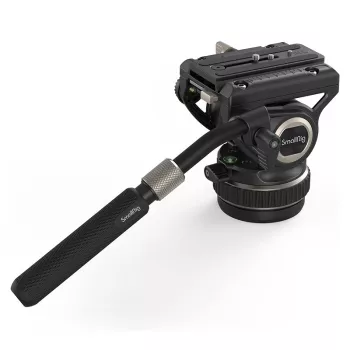
- Heavy-Duty Articulating Overhead Camera Mount (useful for filming form checks, progress clips, or overhead workout demos)
- Timberland Men’s Leather Boots (a sturdy option for outdoor training days when you want more protection underfoot)
FAQ
Where should the protective sleeve sit on the rope?
Place it at the main friction zone—most often where the rope rubs the ground or meets the anchor edge. If you change your anchor point or floor lane, move the sleeve so it covers the new contact spot.
What is a safe anchor point for battle rope training?
Use a rigid, non-moving point that can handle repeated pulling and slamming forces, such as a rack post, a properly installed wall mount into studs, or a purpose-built floor anchor. Avoid lightweight furniture or unstable posts.
How long should battle rope intervals be for conditioning?
Common ranges are 10–30 seconds of hard work with 30–60 seconds of rest. Start conservatively, prioritize consistent wave quality, and build total rounds before pushing intensity.








Leave a comment